How to Disassemble Sony Xperia XA Ultra F3211/F3212: A Complete Take Apart Tutorial
What You’ll Need to disassemble Sony Xperia XA Ultra
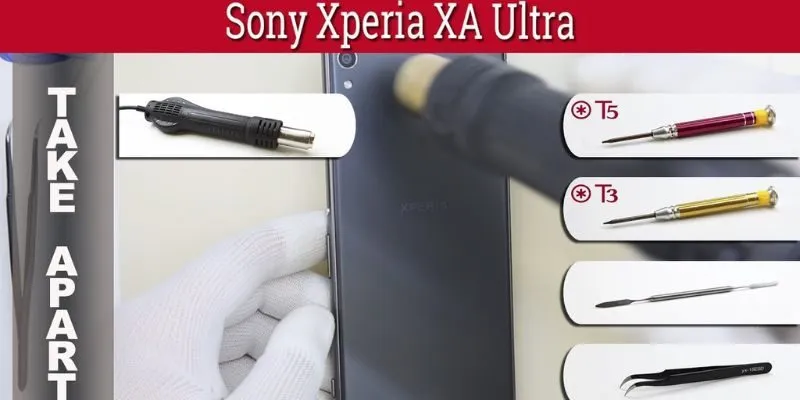
Before you begin, make sure you have the necessary tools and equipment to disassemble Sony Xperia XA Ultra F3211/F3212 safely:
- A small Phillips screwdriver (cross-head)
- Plastic pry tools
- Suction cup tool
- Tweezers
- SIM card ejector tool
- Anti-static wrist strap (optional, for safety)
- A clean, flat workspace
Step 1: Power Off Your Device
The first and most important step before starting any disassemble Sony Xperia XA Ultra is to power off the phone completely. This will prevent any electrical shorts or accidental damage to the internal components. Hold the power button and select “Power off” from the options that appear. Wait until the screen turns black and the phone shuts down.
Step 2: Remove the SIM Card Tray
Before you start opening your Sony Xperia XA Ultra F3211/F3212, you’ll need to remove the SIM card tray. Using a SIM card ejector tool, push gently into the SIM tray slot on the side of the phone. Pull the tray out carefully and set it aside. This step is essential as it avoids any damage to the tray during the disassembly process.
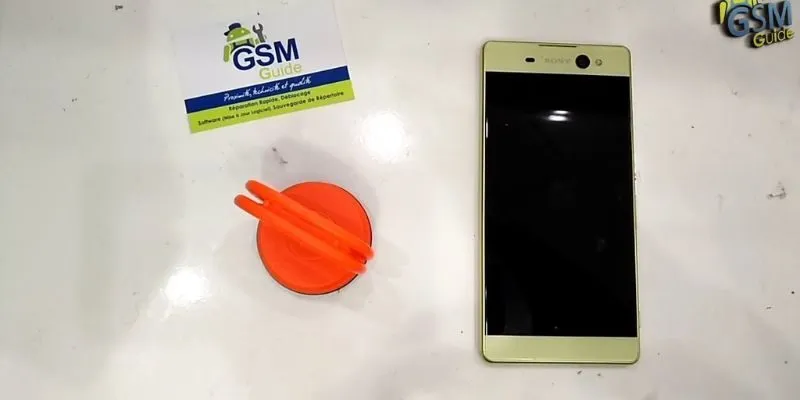
Step 3: Remove the Back Cover
To disassemble Sony Xperia XA Ultra F3211/F3212, you must first detach the back cover. Start by using a plastic pry tool to gently work around the edges of the phone. Begin from the bottom and slowly work your way up to avoid breaking or cracking the plastic frame. Be careful not to apply too much pressure, as the back cover may be fragile, and too much force can cause it to snap.
You may also use a suction cup tool to help lift the back cover off more easily, especially if the phone’s adhesive is still strong. Gently pull the suction cup while using the pry tool to separate the cover from the body of the phone.
Step 4: Unscrew the Screws
Once the back cover is removed, you’ll see several screws holding the internal components in place. Use your small Phillips screwdriver to remove these screws. Keep them in a safe place so you don’t lose any.
Make sure to note the location of each screw, as they might be different sizes, and replacing them in the wrong spots could cause problems when reassembling the phone.
Step 5: Disconnect the Battery
After removing the screws, you’ll likely see a battery connector. Use a plastic pry tool to gently lift the battery connector from the motherboard. Be very cautious not to damage the connector or the surrounding components. Disconnecting the battery is essential to avoid any power running through the phone while you’re working on it.
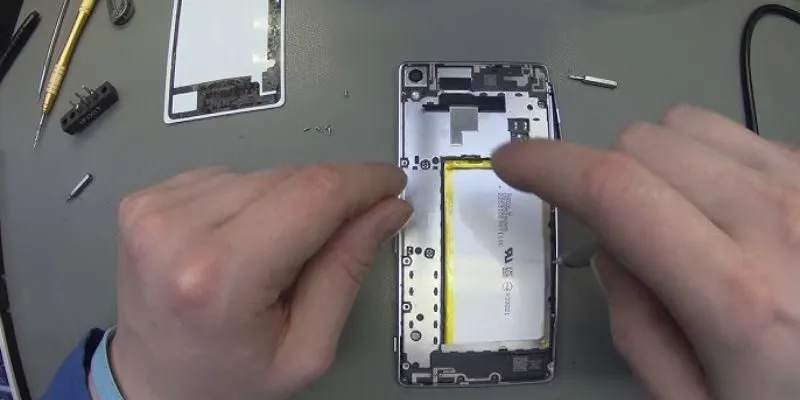
Step 6: Remove the Battery
Once the battery is disconnected, you can carefully remove it from the phone. The battery may be held in place with adhesive, so if it doesn’t come out easily, gently wiggle it free using a plastic tool to lift it without damaging the battery.
Take care when removing the battery, as applying excessive force can puncture the battery or cause leakage, which is hazardous.
Step 7: Disassemble the Other Components
Now that you’ve removed the battery, you can continue disassembling Sony Xperia XA Ultra F3211/F3212 by taking out other components like the motherboard, camera modules, and speaker. Be sure to disconnect any additional connectors carefully and remember where everything is located. The front camera and rear camera may also be held in place by screws or clips, so make sure you remove them gently.
Use your tweezers for any small components or connectors that need to be handled carefully.
Step 8: Reassemble the Device
Once you’ve completed the disassembly and either repaired or replaced the necessary components, it’s time to reassemble your phone. Begin by placing the battery back in its compartment and reconnecting the battery connector to the motherboard. Then, follow the reverse order of steps to reattach all components. Start by securing the screws and carefully placing the back cover back onto the phone.
Be sure to press around the edges of the cover to ensure the adhesive sticks well. Re-insert the SIM card tray, power up the device, and check if everything works as expected.
Additional Tips and Warnings
- Take Your Time: Don’t rush through the disassembly process. Take your time to carefully follow each step to avoid damaging the device.
- Use the Right Tools: Always use plastic pry tools and screwdrivers designed for smartphones to prevent scratching or damaging delicate parts of your phone.
- Keep Track of Components: As you remove screws and components, keep them organized. This will help you reassemble your phone easily without confusion.
- Work on a Static-Free Surface: Static electricity can damage the internal parts of your phone, so work on a static-free surface and consider wearing an anti-static wrist strap.
Conclusion
Knowing how to disassemble Sony Xperia XA Ultra F3211/F3212 can be an invaluable skill for those interested in repairing or upgrading their devices. While the process may seem complicated at first, by following the proper steps, using the right tools, and being patient, you can safely take apart and reassemble your phone. Always remember to handle internal components with care, and you’ll be able to enjoy your Xperia XA Ultra for years to come.
How to disassemble Sony Xperia XA Ultra by himself.
Disassembly (take apart) and repair smartphone Sony Xperia XA Ultra F3211 F3212 F3215 F3216 F3213 at home with a minimal set of tools.If that video was useful for you, don’t forget to put Like or write a comment 🙂
Our site:
We in ВК:
Facebook:
Instagram:
Our channel:
Address video:
Warning
This content is intended to be used for informational and entertainment purposes only.
You are using these video direction and it’s content at your own risk.
Following these directions on this video will void your warranty. You are performing this repair at your own risk
Music that is used in video:
EDM Detection Mode by Kevin MacLeod is licensed under a Creative Commons Attribution license (
Source:
Artist:
Prelude No. 19 by Chris Zabriskie is licensed under a Creative Commons Attribution license (
Source:
Artist:
Nguồn: https://paranormal-association.com/
Xem thêm bài viết khác:
Trên tay Sony X Performance Nhật: Snapdragon 820, camera 23Mpx, giá chỉ 5990K
TEST GAME SONY X PERFORMANCE giá 1tr8 đặt trên LAZADA, SHOPEE. NÓNG LAG?? | MỞ HỘP MUA HÀNG ONLINE